Friday, 16 May 2014
Thursday, 15 May 2014
Orkish Cannon Design: Reflective journal
My premise for this project initially began with a very simple aim, sculpt a weapon, preferabley of the projectile variety, create a low poly mesh, texture it, and get it rendering in real time, either with marmoset, or in engine with UDK.
The main goals of this were to:
My original project proposal slides can be found here.
My main original sources of inspiration at the time was the killzone franchise, something futuristic, yet not out of reach of what we currently had, still relying on conventional firing mechanisms of bullets. I was hooked on all of my designs having something that they could share in some way, at the time I was largley interested in creating two different weapon sets for clearly different factions, and I think it shows, some are more stubby and clearly setup for close range combat while others are designed to take down their foes from a longer range.
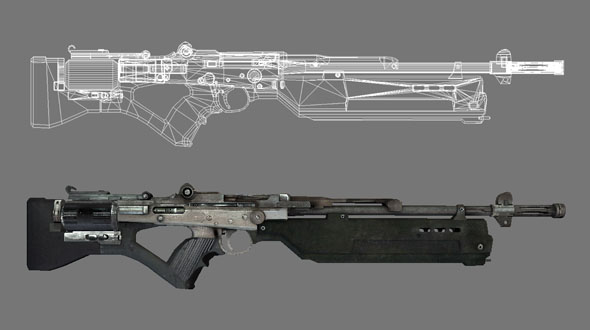
Having been in cadets as during secondary school I know my way around a rifle fairly well, specifically the SA80 A2, the cadet version of the british armed forces standard issue rifle. One of its core and slightly more unusual features is the bullpup magazine, this is where the magazine and trigger mechanism housing are located behind the grip and trigger. This is done to effectively lengthen the barrel, whilst keeping the rifles size compact. A longer barrel means a more accurate shot, and a lower likelihood of the bullet straying from its mark. This also raises the important definition between a rifle and a gun, a rifle has rifles, small grooves down the inside of a barrel that cause the bullet to spin, this spinning motion (which is accentuated by the longer barrel) is what keeps the cone of fire small at a longer range, a gun, as in a pistol lacks rifling in most cases and is what keeps the weapon as a short range firearm. Other key features i picked up from my knowledge of using weapons is that a cheek plate of some sort is incredibly useful when aiming, and that area needs to be kept clear, with a suitable length in the rear portion of the gun, so that when held close the user isn't at risk of smashing themselves in the eye with the scope due to recoil. In a similar fashion, the dust cover, and empty casings should eject from a port on the right hand side of the weapon (for a right handed user) so as not to blind them when the are spat out by the rifle.

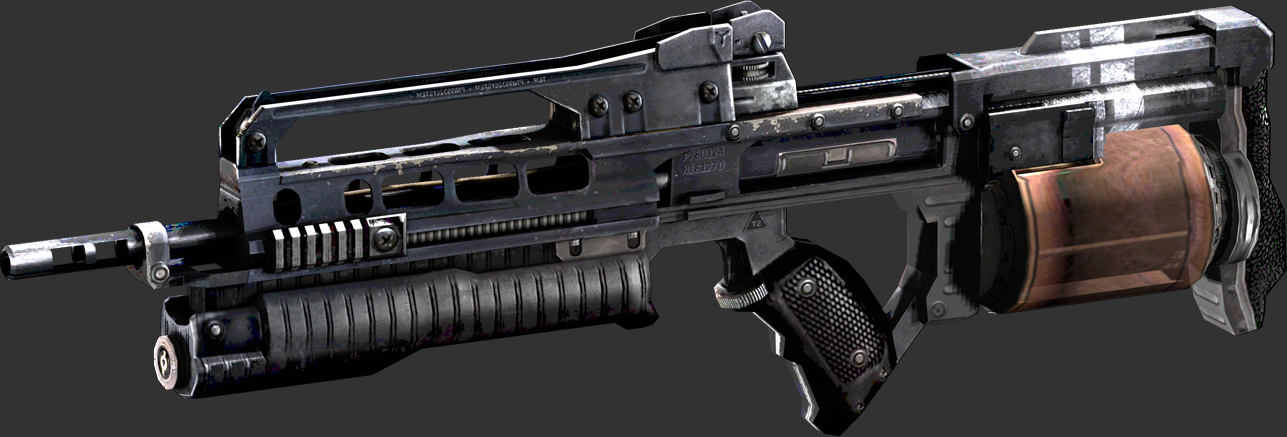
With this in mind, looking back to my primary inspiration for the weapon, Hellghan weaponry all shared one attribute, they all featured a cylindrical bullpup magazine, and were typically well worn, with strong hard geometric angular shapes. In particular i was captivated by the STA 14, a semi automatic mid - long range rifle with a focus on fewer more accurate powerful shots. The gun ingame just handled so well, and felt like it had a real kick to it and forced you into a certain style of play, one that wasn't afraid to get up close and personal, but still could allow the player to hang back. To give you a feel for that, heres a select number of the helghan arsenal and a video of my favourite weapon from the franchise ingame.It's also worth noting the very industrial and produced feel these have.


With these in mind i went to do my first proper sculpt paying attention to these core principles I built something that fit in with this line of weaponry. Keeping the forms clean and geometric, with an easily readable silhouette.

I put a lot of effort into this particular model, and did a lot of on the fly iterations, It was also my first real attempt at producing hard surfaces through the use of polygroup masking and groups loops, as well as experimenting with extracts and IMM brushes to create additional geometry.
After creating the base mesh, which took me the best part of a full working day, 5-7 hours, I then did a pass of the model with alpha maps.to model in wear and tear on the weapon.

The detailing on the magazine was done with several passes and experimentation with the rotational symmetry function, however, this high detailing especially on the rear half of the weapon was all well an good as far as showmanship goes, however it had the side effect of bumping up the number of polygons in the mesh by far too much, and whilst despite my best efforts, i then struggled to knock the polycount down when i attempted to reduce it using zremesh and other tools such as removing excess loops. Before I lost either hard edges, or areas of detail, even breaking the muzzle flash guards geometry in the areas where it was too thin for zbrush to handle. Along with this, i'd made the mistake of merging a lot of the different meshes that the core body of the gun was comprised of along the way, even in its slightly reduced form, I struggled both exporting it, and persuading UVmaster to even attempt to UV the mesh. even after splitting it up into two different parts, and using things such as polygroup islands, I couldn't get it in such a state that zbrush would process it, TLDR I learnt that i need to work on a lower poly mesh to begin with. or do iterative saves more often so that I can access a prior version when it comes to the stage of culling geometry.


Anyhow, the project wasn't a complete failure, i learnt from my mistakes, and i've got a solid idea i can return to and remake given the proper processes, I didn't feel it was worthwhile to continue with this, mostly because I was sick of looking at the thing and just wanted to move onto something fresh. The other problem was that it didn't really fill a niche that the armoury wasn't lacking for the Hellghast, so what purpose would it serve ?
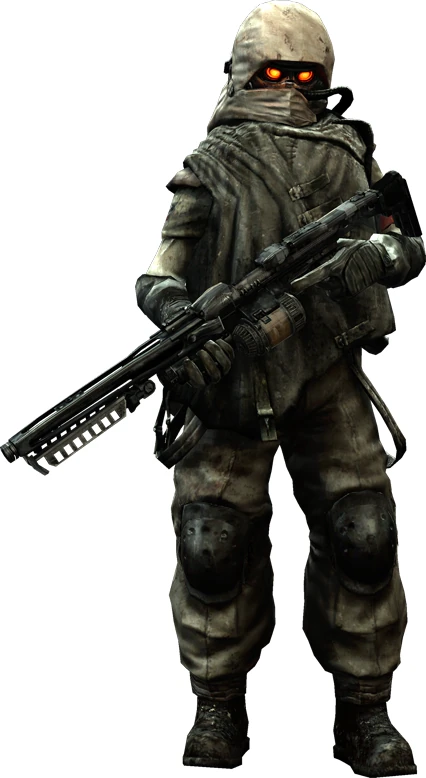
I'd been looking at some concept art of both the desert level in Killzone and loved the idea of how the Hellghast troops had rebreathers, and tattered cloth hoods / masks to act as camouflage, I'd also seen a recent sculpt on the polycount forums that really got me interested. Sadly I forgot to bookmark the link but the idea behind it wasn't too dissimilar from this guy here.

Anyhow, still being in the iterative stage of my design, the idea of rebreathers and a desert scrapyard like environment, got me thinking about two things, salvagers, and Warhammer 40k's space marines. The warhammer universe has always been a huge inspiration for me having grown up on the tabletop game. Whilst originally a tyranid player, had a few friends who played orks, at the time I didn't really vibe on their scrapyard-esque feel, but it's grown on me. I dropped the idea of tactile lightweight and easy to handle weapon, in favour of something clunky, more powerful, that would hopefully have the feel that it was assembled from whatever was to hand. perhaps even wrapped the same tattered cloth in parts as a throwback to my original ideas. So work began anew, this time, as they say, "for the WAAAAGGHHHH!!"


I loved the scrappy cobbled together nature of their designs, all of which manage to make themselves look brutal, often featuring exaggerated barrels heavy recast iron forms, and spikes. They epitomize needless brutality and give off an almost feral nature. Looking at the lore behind warhammers orks, they more or less live for tribal warfare amongst their clans, whilst raiding isolated planets, their technology whilst fairly advanced, is also very primal, nothing spared to pretty it up, loose cables and wires and gas canisters. Heck, they even strap rockets to their backs to mimic the Space marines jump packs.

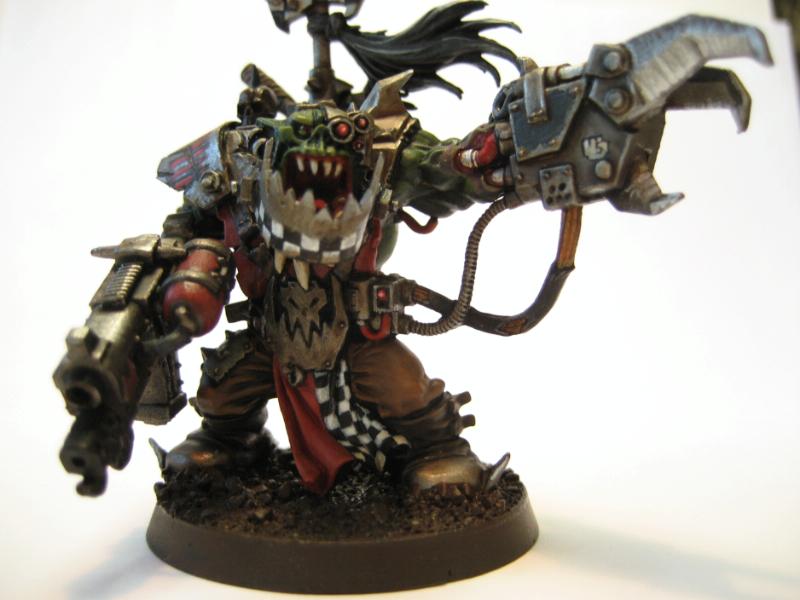
For whatever reason, they also like checker patterns and painting things bright red, in a similar logic to go faster stripes, they give their guns more "dakka". If you were to look at an ork "warboss" they also decorate themselves with trophies, one of the most noticeable ones being the large metalic jaws that they wear, large teeth are seen as a status symbol in ork society, and these go to enhance that. As well as showing off the skulls of your enemies on a banner or some sort, that also works.

Anyway bearing a lot of this in mind I went to zbrush to create something, I was going to start from a large exaggerated barrel, a common feature of their weapons and work outwards, trying to keep the from simple, but looking as if it was scraped together out of various pipes and bits of tubing, the idea being that it would fire moderatley heavy shells, or repurposed bolter rounds, which are basically big ass bullets, that explode on impact, also they're self propelling, as in, they have small rocket boosters attached to their rear end to keep them at a high velocity, whilst a stabilizer chip makes them fly straight. (ok, i know too much about this kinda stuff than is probably healthy, but eh, thats how it is)
ANYWAY first iterations based themselves off big large barrel, and a few things like the cylindrical clip from killzone.

This was the first one I came up with, more intent to work into the muzzle flash hider, but the base it was on felt strong, providing a good silhouette and a less conventional way of holding the weapon, that would suit the more brutal and functional nature of the orks.

Shortened it up a bit, accuracy isn't all that important, they like to fight at close range, with a mix of melee and ranged weapons. and at that range, a muzzle flash hider doesn't offer anything, heck, the orks also enjoy the spectacle of "waagh" more flashy things that go dakka is highly advantageous.

Added something that i thought as less of a flash hider, more of something to allow the weapon to vent faster, when firing rounds whilst providing a smaller accuracy boost. the typical high fire rate and large calibre of rounds they use would quickly lead to overheating in previous designs.

Tried a bit more of an elongated design, added a scope, gas canister, and excess pipes, the idea being that the canister vented the otherwise high pressure fumes in the weapon and used the compressed result to assist in the reloading. I've also moved the handle, to support a more conventional manner of fire, leaving the weapon more suitable for the prone position. The magazine has also moved onto the side as it was getting in the way of the handle., though it is now a bit too close to the users face for liking, but not too much so. Again, trying to keep the core shapes simple here, to ease up when i create the low poly. The scope felt a little too out of place too I'd wanted to make it look as if it had bands of metal around it, to strap it on, but kinda went overboard on it all.

This was my final iteration in the series, really felt it fit the ork aesthetic of bits just being clobbered together and added on, its a bit more flimsly looking that i'd like, but it's still stuck with this idea of being mostly cylindrical. I added a guard for the magazine, and put it at a more interesting angle. Swapped the high tech scope out for a rather inaccurate ironsight, that has two scrappy pins to line up with the foresight, not that orks really aim their guns most of the time. The idea in general behind this was that it was a bit more precise and stealthy, but also orky, as such, I turned the gas canister on the side into a flamethrower, and added a big beefy silencer on the end of the gun. Something that the Ork Kommando unit was lacking, something for a primarily longer range role, not necessarily a sniper, but not so up close and personal. Ork kommandos are the only stealth unit available to the faction, though in a rather similar way to action movie tropes, smoking cigars, being badass, and generally pretty bad at being sneaky and just disrupting the back lines of a force by blowing shit up. And the flamethrower for something long range, hey why not ? I'm certain an Ork wouldn't throw up a chance to strap one onto the side of a weapon were he given it, that's just how they are, more dakka and all that.

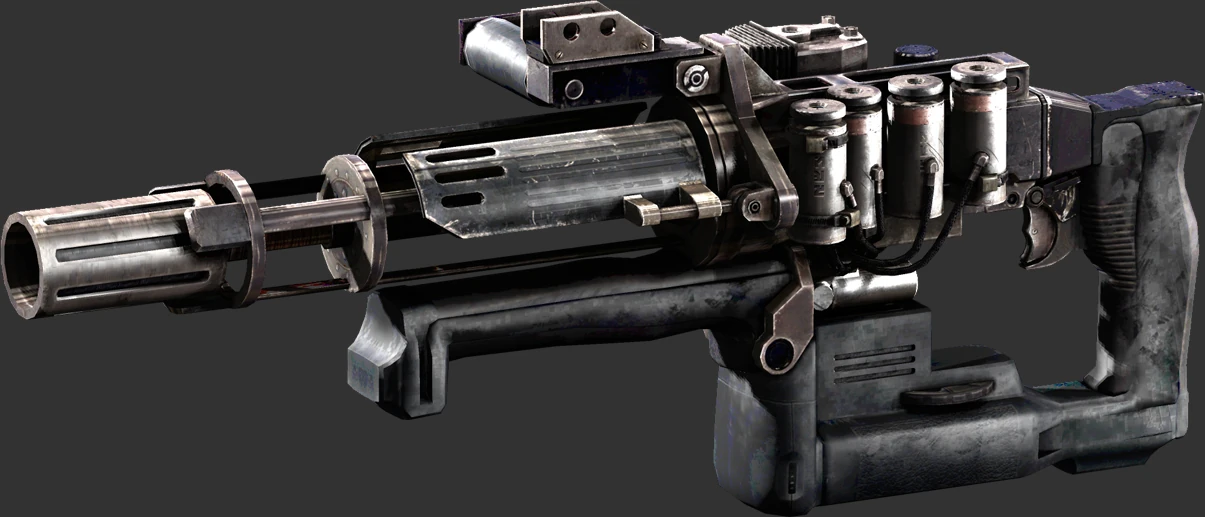
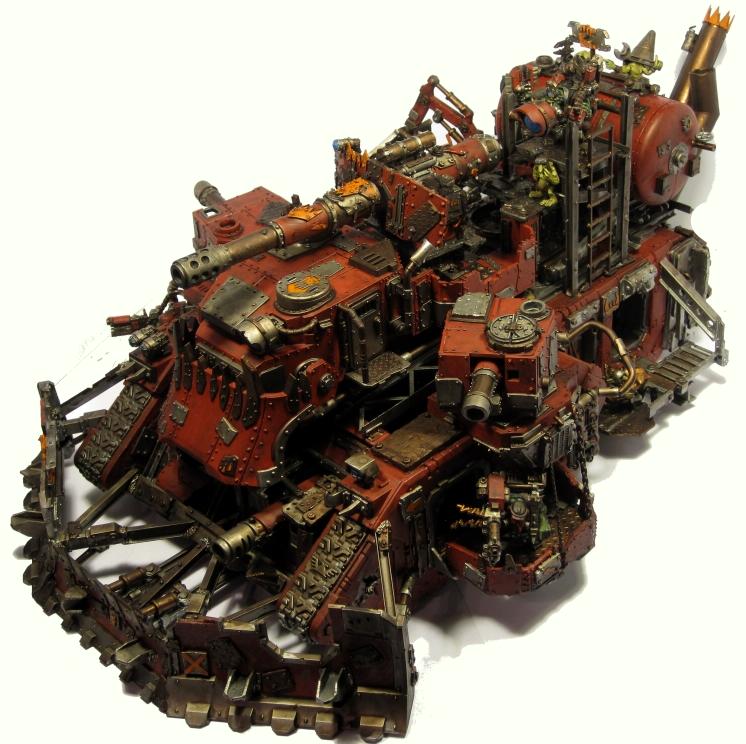
Also going through my files, seems i missed one, and speaking of more dakka (firepower / guns) i've come across this beast

More barrels are always good for ork weapons, and hey, don't mind those loose cables, it's probably going to work out fine, right up until it blows up in their face, literally, not that they'd care about that. They aren't particularly sympathetic creatures, and would find the demise of their comrade amusing, one less competitor for their drive for dominance within their own clan.

Here's another early concept i found lying around, before i got onto the ideas of Orks and all, this apparently came up, I'm not sure it has any particular merit, but the hard surfaces are pretty well formed, and it has a very alien feel to its design, probably because of the bullpup disk magazine and the needles number of dials on the scope.
Taking a step back to my final Orkish iteration, i did actually attempt a low poly mesh and uving, though, my distribution was pretty poor I do like how it turned out, I also uved it but ran into frequent problems in the areas such as the flamethrower and the small pipes just above the handle where I had merged and dynameshed multiple primitives together, which was a mistake, this served as a fairly big reminder to not merge subtools often, and keep the core base shapes of them simple.

With that lesson learnt i took a quick step away from the orks, and looked at the boltgun and boltpistol used by the space / chaos space marines, some of their weapons feature highly ornate engravings, which was starting to interest me, and barrels protruding out of the mouths of mythical demons or warp beasts and the likes. This was a rather short lived experiment, but honestly, it spawned out of wanting to model some more organic shapes, I'd had enough cylinders to last me a month.


I quite liked some of these ornate carvings and the cloth, they really helped distinguish the weapon from just some regular issue item, into something to be wielded by a hero, something that told of valorous deeds, however I realized if i were to go any further with these ideas, they would only lead me further down the path of far too complex meshes for me to handle. I needed something that at its core was simple, simplicity would make it more effective, and more easily readable from a distance in a game environment. However the idea with the mouths was interesting, and after seeing a piece of concept art for Warlords of Draenor a spark lit up in my head.


Being an enthusiast in Blizzards franchises and art, especially things pertaining to WoW as I currently maintain a position as a semi professional within the raiding scene. this spoke to me, something big clean and over the top, that just oozed character and brutality. I loved the jaws on the front of it, and they weren't too far from my original idea of the orks, where the warchiefs have these big metallic, or semi metallic jaws. The idea of a large underslung weapon that was too hefty for any human to use seemed pretty cool. So yeh, I decided to do my own take on this, and make it relevant to the Warhammer universe.


This was what i came up with as my base mesh, Easily readable from a distance, mostly clean primitives, that were easilly readable from a distance. The almost Wild face on the front of it, aided by the asymmetrical part of the bottom skull, and the eye being repurposed as a targeting sensor gave it a brutal feel, as well as the simple fact that it had skulls on either end, with POINTY BITS that made the weapon look raw and unharnessed, even if you were to get close to its user, it would pose a significant threat as a melee weapon in itself. At this point in the design i wasn't sure what it fired, but one thing was certain, that and the upper jaws teeth needed moving out of the way of the barrel. I Had thoughts of it being almost a handheld mortar / artillery piece, or the object on the back near the skull being a sort of tesla coil, as orks like things that go zap as much as things that go dakka. But I originally settled on having the thing be a particle weapon. Which isn't something the orks actually have available to them in a major way. It had a niche purpose, and it looked badass, what more could i ask for. I added more tubes in my procedural iterations around what would become the fuel canister, and added vents for it to expel the heat on the underside of the cannon. I kept the mesh from here, with those few changes then went for a high poly sculpt, and this is what it came out looking like. One other thing first actually, it originally only had the lower jaw on the head, the whole eyepiece and upper jaw was primarilly added in because i felt the weapon was too back heavy with the larger skull on its rear.
OK, high poly sculpt time.


This came out way better than I imagined, added surface detail for everything, the jaw at the front would be almost half and half fossilized bone / creature hide and metal, the midriff of it was to have a wooden / leather casing, I feel that area of the body just needed a different material to break it up a bit, and make it less bland and plain that more tubes. I perforated what was going to be a gas can on the back, gave the barrel rifling even though it fired an energy weapon ? Probably not my greatest idea.. But yeh, holy crap, badass, now to work on the low poly, I took my medium poly sculpt from earlier, and used a few main tools to bring it down.
In my first pass I simply Z-remeshed everything and dynameshed, repeating the process till i got it as low as I could with as much definition as possible. For my second pass, more of the same, as well as using the function to delete recurring/ needless edge loops in the model.
The third pass was something else entirely, more on that in a moment though, heres a quick comparison of the passes I did and the resulting meshes. 8.8 mill -> 31k tris.along with the final Ambient occlusion baking onto the low poly mesh.


Whilst this that low poly is the final outcome I'm going to stave off it for a bit, as it wasn't actually created until after I encounters some other issues, I originally UV'd on my medium low poly mesh at 191k tris.


I used Zbrushes UV master tool for this, and set it to UV objects by polygroup, keeping them to separate "islands", and to attract the seams to the AO, such that they would be less easilly visible. this however came with its problems, It was INCREDIBLY poor at unwrapping the hard surface materials, causing needless distortion in an attempt to keep the number of seams as low as possible. sure less is good, but I'd take more hidden, but less noticeable seems anyday. Anyhow, I carried on like this and even baked an AO map onto this medium low mesh.

This looked all well and good, but aside from the high polycount, It was frought with baking problems, I had lazily exported both the high and low poly as one object, leading to things like the handle baking the grip onto the main body of the cannon.

To solve this I would have to bake each mesh within the object separately then recombine them in maya. funtimes... I did however solider through, and despite the error did a quick mockup, just because i wanted to see it in the renderer, even if it was with some solid prefab material.

It looked nice, however I had several observations, firstly the cross baking was even more noticable than i would have liked, secondly, the cylinders did not look cylinder, after looking into this i realised that this was because i had not smothed the normals out, in particular on the verts going lengthways down the model.
Whilst in Maya, I was unhappy with how some of the parts, like the main body had not uved properly, Lots of the cylinders in the earlier uv sheed showed distortion of some sort, where it had tried to flatten the end piece of the cylinder into the same UV, whilst keeping a plethora of faces still connected to the main thing. Anyways, I carried on and UVed the main body. leaving the rest of it untouched, I should point out though, UV master did a stellar job on the skull pieces, and saved huge amounts of time there, perfectly symmetrical seams, and uvs, with no distortion at all.

Started to rescale some parts trying to layout everything so it could be on the same UV sheet, however I encountered problems with the checker pattern Maya was giving me, it wasn't a flat texture, and was cropping itself to the uvs, needing me to create a new one each time i changed something, very frustrating, I ended up downloading a custom 4096 x4096 checker and using that instead. ALSO PRETTY COLOURS


Distortion was pretty minimal across the board, some was slightly noticeable in areas, but nothing to be concerned with.


The main goals of this were to:
- Advance my hard surface modelling techniques
- Learn to use UV master, Zremesher, and Decimation master to create a low polygon mesh with UVs
- Experience the entire pipeline, from concept to creation of a game ready asset
- Last but not least, to introduce myself to the Quixel suite of programs, Ndo and Ddo using them to assist in the creation of my textures.
The reason why, what it was all about per se, was to look into how a gun or a rifle can reflect on its user and almost be a character in it's own right about the user, if a weapon can do this, especially if designed for a hero character, or special enemy, heck even the clear and obvious difference between each factions weaponry in certain games, can telegraph a lot not only giving them a unique look, but one that is recognizable, even from a distance improving the games readability and gameplay.
My original project proposal slides can be found here.
My main original sources of inspiration at the time was the killzone franchise, something futuristic, yet not out of reach of what we currently had, still relying on conventional firing mechanisms of bullets. I was hooked on all of my designs having something that they could share in some way, at the time I was largley interested in creating two different weapon sets for clearly different factions, and I think it shows, some are more stubby and clearly setup for close range combat while others are designed to take down their foes from a longer range.
Having been in cadets as during secondary school I know my way around a rifle fairly well, specifically the SA80 A2, the cadet version of the british armed forces standard issue rifle. One of its core and slightly more unusual features is the bullpup magazine, this is where the magazine and trigger mechanism housing are located behind the grip and trigger. This is done to effectively lengthen the barrel, whilst keeping the rifles size compact. A longer barrel means a more accurate shot, and a lower likelihood of the bullet straying from its mark. This also raises the important definition between a rifle and a gun, a rifle has rifles, small grooves down the inside of a barrel that cause the bullet to spin, this spinning motion (which is accentuated by the longer barrel) is what keeps the cone of fire small at a longer range, a gun, as in a pistol lacks rifling in most cases and is what keeps the weapon as a short range firearm. Other key features i picked up from my knowledge of using weapons is that a cheek plate of some sort is incredibly useful when aiming, and that area needs to be kept clear, with a suitable length in the rear portion of the gun, so that when held close the user isn't at risk of smashing themselves in the eye with the scope due to recoil. In a similar fashion, the dust cover, and empty casings should eject from a port on the right hand side of the weapon (for a right handed user) so as not to blind them when the are spat out by the rifle.

With this in mind, looking back to my primary inspiration for the weapon, Hellghan weaponry all shared one attribute, they all featured a cylindrical bullpup magazine, and were typically well worn, with strong hard geometric angular shapes. In particular i was captivated by the STA 14, a semi automatic mid - long range rifle with a focus on fewer more accurate powerful shots. The gun ingame just handled so well, and felt like it had a real kick to it and forced you into a certain style of play, one that wasn't afraid to get up close and personal, but still could allow the player to hang back. To give you a feel for that, heres a select number of the helghan arsenal and a video of my favourite weapon from the franchise ingame.It's also worth noting the very industrial and produced feel these have.
With these in mind i went to do my first proper sculpt paying attention to these core principles I built something that fit in with this line of weaponry. Keeping the forms clean and geometric, with an easily readable silhouette.

I put a lot of effort into this particular model, and did a lot of on the fly iterations, It was also my first real attempt at producing hard surfaces through the use of polygroup masking and groups loops, as well as experimenting with extracts and IMM brushes to create additional geometry.
After creating the base mesh, which took me the best part of a full working day, 5-7 hours, I then did a pass of the model with alpha maps.to model in wear and tear on the weapon.

The detailing on the magazine was done with several passes and experimentation with the rotational symmetry function, however, this high detailing especially on the rear half of the weapon was all well an good as far as showmanship goes, however it had the side effect of bumping up the number of polygons in the mesh by far too much, and whilst despite my best efforts, i then struggled to knock the polycount down when i attempted to reduce it using zremesh and other tools such as removing excess loops. Before I lost either hard edges, or areas of detail, even breaking the muzzle flash guards geometry in the areas where it was too thin for zbrush to handle. Along with this, i'd made the mistake of merging a lot of the different meshes that the core body of the gun was comprised of along the way, even in its slightly reduced form, I struggled both exporting it, and persuading UVmaster to even attempt to UV the mesh. even after splitting it up into two different parts, and using things such as polygroup islands, I couldn't get it in such a state that zbrush would process it, TLDR I learnt that i need to work on a lower poly mesh to begin with. or do iterative saves more often so that I can access a prior version when it comes to the stage of culling geometry.


Anyhow, the project wasn't a complete failure, i learnt from my mistakes, and i've got a solid idea i can return to and remake given the proper processes, I didn't feel it was worthwhile to continue with this, mostly because I was sick of looking at the thing and just wanted to move onto something fresh. The other problem was that it didn't really fill a niche that the armoury wasn't lacking for the Hellghast, so what purpose would it serve ?
I'd been looking at some concept art of both the desert level in Killzone and loved the idea of how the Hellghast troops had rebreathers, and tattered cloth hoods / masks to act as camouflage, I'd also seen a recent sculpt on the polycount forums that really got me interested. Sadly I forgot to bookmark the link but the idea behind it wasn't too dissimilar from this guy here.
Anyhow, still being in the iterative stage of my design, the idea of rebreathers and a desert scrapyard like environment, got me thinking about two things, salvagers, and Warhammer 40k's space marines. The warhammer universe has always been a huge inspiration for me having grown up on the tabletop game. Whilst originally a tyranid player, had a few friends who played orks, at the time I didn't really vibe on their scrapyard-esque feel, but it's grown on me. I dropped the idea of tactile lightweight and easy to handle weapon, in favour of something clunky, more powerful, that would hopefully have the feel that it was assembled from whatever was to hand. perhaps even wrapped the same tattered cloth in parts as a throwback to my original ideas. So work began anew, this time, as they say, "for the WAAAAGGHHHH!!"
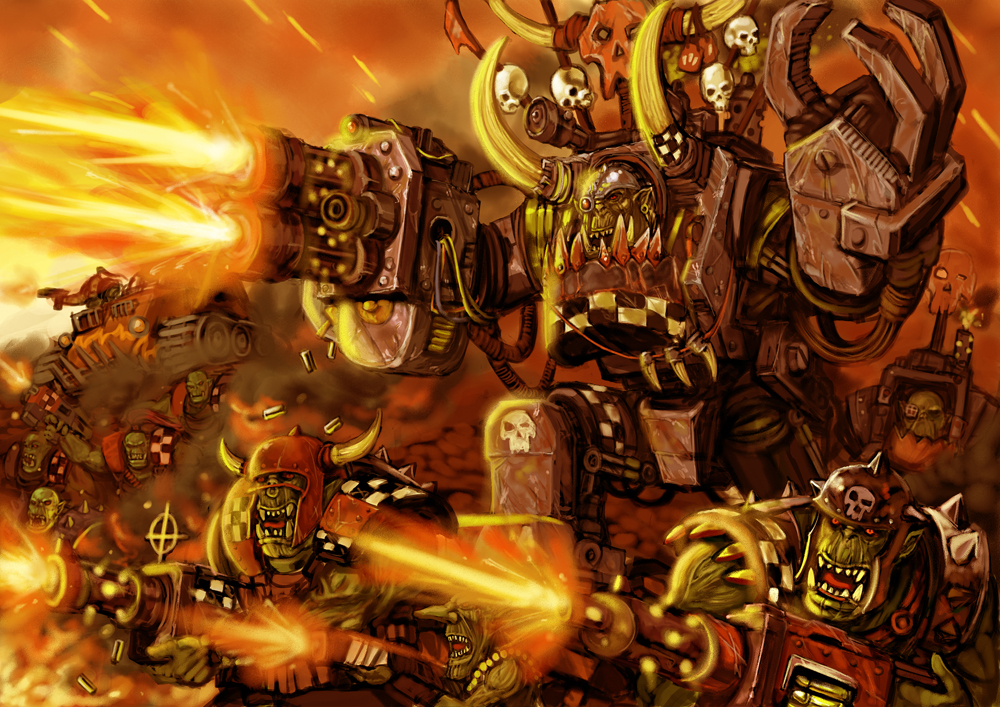
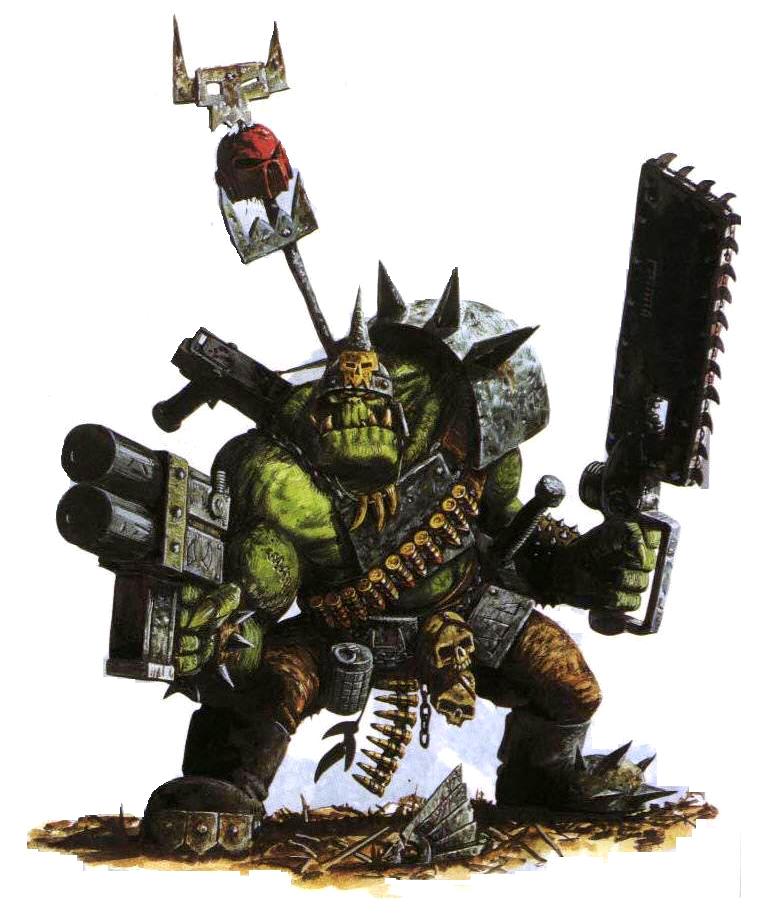

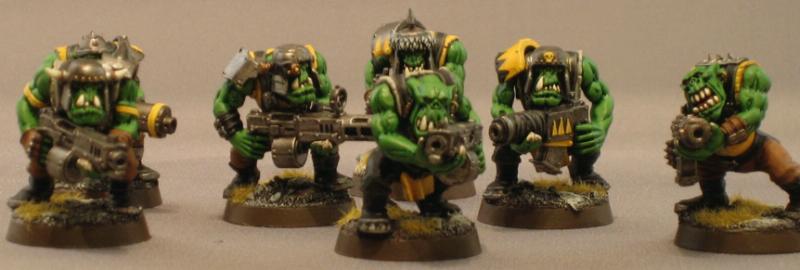
I loved the scrappy cobbled together nature of their designs, all of which manage to make themselves look brutal, often featuring exaggerated barrels heavy recast iron forms, and spikes. They epitomize needless brutality and give off an almost feral nature. Looking at the lore behind warhammers orks, they more or less live for tribal warfare amongst their clans, whilst raiding isolated planets, their technology whilst fairly advanced, is also very primal, nothing spared to pretty it up, loose cables and wires and gas canisters. Heck, they even strap rockets to their backs to mimic the Space marines jump packs.

For whatever reason, they also like checker patterns and painting things bright red, in a similar logic to go faster stripes, they give their guns more "dakka". If you were to look at an ork "warboss" they also decorate themselves with trophies, one of the most noticeable ones being the large metalic jaws that they wear, large teeth are seen as a status symbol in ork society, and these go to enhance that. As well as showing off the skulls of your enemies on a banner or some sort, that also works.
Anyway bearing a lot of this in mind I went to zbrush to create something, I was going to start from a large exaggerated barrel, a common feature of their weapons and work outwards, trying to keep the from simple, but looking as if it was scraped together out of various pipes and bits of tubing, the idea being that it would fire moderatley heavy shells, or repurposed bolter rounds, which are basically big ass bullets, that explode on impact, also they're self propelling, as in, they have small rocket boosters attached to their rear end to keep them at a high velocity, whilst a stabilizer chip makes them fly straight. (ok, i know too much about this kinda stuff than is probably healthy, but eh, thats how it is)
ANYWAY first iterations based themselves off big large barrel, and a few things like the cylindrical clip from killzone.

This was the first one I came up with, more intent to work into the muzzle flash hider, but the base it was on felt strong, providing a good silhouette and a less conventional way of holding the weapon, that would suit the more brutal and functional nature of the orks.

Shortened it up a bit, accuracy isn't all that important, they like to fight at close range, with a mix of melee and ranged weapons. and at that range, a muzzle flash hider doesn't offer anything, heck, the orks also enjoy the spectacle of "waagh" more flashy things that go dakka is highly advantageous.

Added something that i thought as less of a flash hider, more of something to allow the weapon to vent faster, when firing rounds whilst providing a smaller accuracy boost. the typical high fire rate and large calibre of rounds they use would quickly lead to overheating in previous designs.

Tried a bit more of an elongated design, added a scope, gas canister, and excess pipes, the idea being that the canister vented the otherwise high pressure fumes in the weapon and used the compressed result to assist in the reloading. I've also moved the handle, to support a more conventional manner of fire, leaving the weapon more suitable for the prone position. The magazine has also moved onto the side as it was getting in the way of the handle., though it is now a bit too close to the users face for liking, but not too much so. Again, trying to keep the core shapes simple here, to ease up when i create the low poly. The scope felt a little too out of place too I'd wanted to make it look as if it had bands of metal around it, to strap it on, but kinda went overboard on it all.

This was my final iteration in the series, really felt it fit the ork aesthetic of bits just being clobbered together and added on, its a bit more flimsly looking that i'd like, but it's still stuck with this idea of being mostly cylindrical. I added a guard for the magazine, and put it at a more interesting angle. Swapped the high tech scope out for a rather inaccurate ironsight, that has two scrappy pins to line up with the foresight, not that orks really aim their guns most of the time. The idea in general behind this was that it was a bit more precise and stealthy, but also orky, as such, I turned the gas canister on the side into a flamethrower, and added a big beefy silencer on the end of the gun. Something that the Ork Kommando unit was lacking, something for a primarily longer range role, not necessarily a sniper, but not so up close and personal. Ork kommandos are the only stealth unit available to the faction, though in a rather similar way to action movie tropes, smoking cigars, being badass, and generally pretty bad at being sneaky and just disrupting the back lines of a force by blowing shit up. And the flamethrower for something long range, hey why not ? I'm certain an Ork wouldn't throw up a chance to strap one onto the side of a weapon were he given it, that's just how they are, more dakka and all that.

Also going through my files, seems i missed one, and speaking of more dakka (firepower / guns) i've come across this beast

More barrels are always good for ork weapons, and hey, don't mind those loose cables, it's probably going to work out fine, right up until it blows up in their face, literally, not that they'd care about that. They aren't particularly sympathetic creatures, and would find the demise of their comrade amusing, one less competitor for their drive for dominance within their own clan.

Here's another early concept i found lying around, before i got onto the ideas of Orks and all, this apparently came up, I'm not sure it has any particular merit, but the hard surfaces are pretty well formed, and it has a very alien feel to its design, probably because of the bullpup disk magazine and the needles number of dials on the scope.
Taking a step back to my final Orkish iteration, i did actually attempt a low poly mesh and uving, though, my distribution was pretty poor I do like how it turned out, I also uved it but ran into frequent problems in the areas such as the flamethrower and the small pipes just above the handle where I had merged and dynameshed multiple primitives together, which was a mistake, this served as a fairly big reminder to not merge subtools often, and keep the core base shapes of them simple.

With that lesson learnt i took a quick step away from the orks, and looked at the boltgun and boltpistol used by the space / chaos space marines, some of their weapons feature highly ornate engravings, which was starting to interest me, and barrels protruding out of the mouths of mythical demons or warp beasts and the likes. This was a rather short lived experiment, but honestly, it spawned out of wanting to model some more organic shapes, I'd had enough cylinders to last me a month.


I quite liked some of these ornate carvings and the cloth, they really helped distinguish the weapon from just some regular issue item, into something to be wielded by a hero, something that told of valorous deeds, however I realized if i were to go any further with these ideas, they would only lead me further down the path of far too complex meshes for me to handle. I needed something that at its core was simple, simplicity would make it more effective, and more easily readable from a distance in a game environment. However the idea with the mouths was interesting, and after seeing a piece of concept art for Warlords of Draenor a spark lit up in my head.


Being an enthusiast in Blizzards franchises and art, especially things pertaining to WoW as I currently maintain a position as a semi professional within the raiding scene. this spoke to me, something big clean and over the top, that just oozed character and brutality. I loved the jaws on the front of it, and they weren't too far from my original idea of the orks, where the warchiefs have these big metallic, or semi metallic jaws. The idea of a large underslung weapon that was too hefty for any human to use seemed pretty cool. So yeh, I decided to do my own take on this, and make it relevant to the Warhammer universe.


This was what i came up with as my base mesh, Easily readable from a distance, mostly clean primitives, that were easilly readable from a distance. The almost Wild face on the front of it, aided by the asymmetrical part of the bottom skull, and the eye being repurposed as a targeting sensor gave it a brutal feel, as well as the simple fact that it had skulls on either end, with POINTY BITS that made the weapon look raw and unharnessed, even if you were to get close to its user, it would pose a significant threat as a melee weapon in itself. At this point in the design i wasn't sure what it fired, but one thing was certain, that and the upper jaws teeth needed moving out of the way of the barrel. I Had thoughts of it being almost a handheld mortar / artillery piece, or the object on the back near the skull being a sort of tesla coil, as orks like things that go zap as much as things that go dakka. But I originally settled on having the thing be a particle weapon. Which isn't something the orks actually have available to them in a major way. It had a niche purpose, and it looked badass, what more could i ask for. I added more tubes in my procedural iterations around what would become the fuel canister, and added vents for it to expel the heat on the underside of the cannon. I kept the mesh from here, with those few changes then went for a high poly sculpt, and this is what it came out looking like. One other thing first actually, it originally only had the lower jaw on the head, the whole eyepiece and upper jaw was primarilly added in because i felt the weapon was too back heavy with the larger skull on its rear.
OK, high poly sculpt time.


This came out way better than I imagined, added surface detail for everything, the jaw at the front would be almost half and half fossilized bone / creature hide and metal, the midriff of it was to have a wooden / leather casing, I feel that area of the body just needed a different material to break it up a bit, and make it less bland and plain that more tubes. I perforated what was going to be a gas can on the back, gave the barrel rifling even though it fired an energy weapon ? Probably not my greatest idea.. But yeh, holy crap, badass, now to work on the low poly, I took my medium poly sculpt from earlier, and used a few main tools to bring it down.
In my first pass I simply Z-remeshed everything and dynameshed, repeating the process till i got it as low as I could with as much definition as possible. For my second pass, more of the same, as well as using the function to delete recurring/ needless edge loops in the model.
The third pass was something else entirely, more on that in a moment though, heres a quick comparison of the passes I did and the resulting meshes. 8.8 mill -> 31k tris.along with the final Ambient occlusion baking onto the low poly mesh.


Whilst this that low poly is the final outcome I'm going to stave off it for a bit, as it wasn't actually created until after I encounters some other issues, I originally UV'd on my medium low poly mesh at 191k tris.


I used Zbrushes UV master tool for this, and set it to UV objects by polygroup, keeping them to separate "islands", and to attract the seams to the AO, such that they would be less easilly visible. this however came with its problems, It was INCREDIBLY poor at unwrapping the hard surface materials, causing needless distortion in an attempt to keep the number of seams as low as possible. sure less is good, but I'd take more hidden, but less noticeable seems anyday. Anyhow, I carried on like this and even baked an AO map onto this medium low mesh.

This looked all well and good, but aside from the high polycount, It was frought with baking problems, I had lazily exported both the high and low poly as one object, leading to things like the handle baking the grip onto the main body of the cannon.

To solve this I would have to bake each mesh within the object separately then recombine them in maya. funtimes... I did however solider through, and despite the error did a quick mockup, just because i wanted to see it in the renderer, even if it was with some solid prefab material.

It looked nice, however I had several observations, firstly the cross baking was even more noticable than i would have liked, secondly, the cylinders did not look cylinder, after looking into this i realised that this was because i had not smothed the normals out, in particular on the verts going lengthways down the model.
Whilst in Maya, I was unhappy with how some of the parts, like the main body had not uved properly, Lots of the cylinders in the earlier uv sheed showed distortion of some sort, where it had tried to flatten the end piece of the cylinder into the same UV, whilst keeping a plethora of faces still connected to the main thing. Anyways, I carried on and UVed the main body. leaving the rest of it untouched, I should point out though, UV master did a stellar job on the skull pieces, and saved huge amounts of time there, perfectly symmetrical seams, and uvs, with no distortion at all.

Started to rescale some parts trying to layout everything so it could be on the same UV sheet, however I encountered problems with the checker pattern Maya was giving me, it wasn't a flat texture, and was cropping itself to the uvs, needing me to create a new one each time i changed something, very frustrating, I ended up downloading a custom 4096 x4096 checker and using that instead. ALSO PRETTY COLOURS


Distortion was pretty minimal across the board, some was slightly noticeable in areas, but nothing to be concerned with.

The next step from here, was for me to colour map my cannon to assign material groups, this went pretty smoothly using the swatch i imported from Ddo, but something struck home really hard during this, I'd noticed it, but thought nothing of it until now, how some of my cylinders seemed to spiral in, and how i couldn't remove edge loops as it selected everything. I only noticed this when trying to fill one of the end pieces with a material, then realizing it wasn't totally flat around the edge some bits were chamfered which seemed fine, but then they'd become more part of the side of the object, not the end piece. Put two and two together, finally realized that the darn thing was a spiral. Coupled with realizing just how high poly my model still was, this spurred me to create a proper UV mesh, screw the weapon for a second faction I was planning, I was going to do one, and do it right.


A few images of the WIP Toplogy in places wasn't amazing and I had a few Ngons, though that didn't worry me too much as they would be normalized when I converted the model to tris anyway, however I tried to get rid of them manually, leaving it to maya to figure out can cause the inserted verts to go in a manner that doesn't really support the form of your object.

3 long days later of deleting stray verts, that manifested in more and more irritating ways, I was done. It was over. Though the process taught me a lot, and even now I look at my mesh and can see areas where I could reduce the polycount more, though, some of those were kept in as a choice, the polycount at the time was low enough already for me to be happy (31k) and I liked having the extra definition in some of the problem areas, one such being the leather grip on the handle. I feel at this point its worth mentioning, every reduction from 191k -> 31k was done manually by hand, removing edges, inserting new ones, not fun.
However my problems during this time, were more than just stay verts. The spiral on the rear gas canister needed dealing with. My solution to this problem was to snap some off the verts, to seperate and delete the spiral between them, I then manually went around and inserted a correct edge loop piece by piece. On completion i then inserted new loops as close to the correct one so as the wouldn't get deformed by the slanted loop on each side where i snapped the spiral off. Dragging these new loops out from the middle, matching them to the radius of existing geometry and then deleting parts of the spiral as I went, essentially rebuilding the whole object piece by piece until its topology was correct, at which point I could then delete excess and unnecessary loops to get the polycount down to what it should be. Finally giving me the clean flat edge I wanted on the end of the canister for the colour map.
Some of my other issues I fixed through duplicates, Zremesher deals with the ends of cylinders weirdly, creating a sort of spiraling mess, that causes havoc when you try to reduce the radial divisions of cylindrical parts, thankfully, the ends of some of these pipes had snapped off, and left open, meaning they topologized in a way that wasn't going to cause me to cry every time, I fixed one of them up, the knowing it had radial symmetry, duplicated it all the way round.. Did a similar thing with the pipes around the back, however their center of symmetry was slightly off, given that they new low poly ones ironically had better definition than the high poly pipes, I simply just allowed them to go without a bake, and let them be.
The rear skulls horns also ended up snapping as I accidently some geometry, a simple reimport and some experimentation with mayas reduction feature managed to fix it pretty sharpish. Those were the only real problems i had creating the mesh, some parts of it were more unruly and tedious than others, but I didn't face any technical difficulties in handling them.
Speaking of the mesh itself, There are plenty of areas where I know the mesh could be reduced further, for starts, any flat circle i have could be done differently, I wasn't entirley aware of this until recently, but the spoke layout i have creates several more polys especially with as many radial divisions as I have on some of them. would be fairly easy to fix. Speaking of radial divisions, some places have too many, nameley the handle, and the tubes on the back, especially considering they wouldn't be seen to the player, I'm actually considering making a seperate 1st person mesh, and seeing just how low i can get it, culling geometry that will be out of the players field of view. Those pipes on the back again too, they currently intersect with the main body, lots of internally facing geometry there that i could clean up.
There are a few extra ring loops than necessary on the handle, and it could easily be pulled down to be a singular extra cylinder over the main handle, but as much as normal maps help, i liked the uneven leather strap having some real volume to it.
Whilst 31k polys for a gun is a bit high on current engine budgets for a weapon, I think that given the complicated mesh of the object it isn't too bad, though, If i were to do a fourth pass, and be way harsher, in terms of purely optimizing for the engine, rather than simply being low enough for marmoset to render without problems. I think i could bring the object down by atleast another 5-10k polys, possibly even more, 15k would be the limit I feel. But it all depends on how harsh i want to be, similar to the handle, corrugated pipes and tubes could also be culled down, and have the cracks delt with normal maps, though, atleast in the case of the tube on the front, i feel the higher polycount is definitely needed to maintain a strong silhouette.
Just another picture of the lowpoly as a reminder of what i've been rambling about.

OK COOL
So polycount aside, somewhere between 30-45 hours later of performing this wonderfully monotonous task, I got to where i was 3 days earlier, colour mapping. This was fairly simple, just assigning preexisting materials in the scene to parts of my final mesh, only complicated part was where I did the lower jaw on the medium low poly mesh, inserting a new loop to follow the change between the metal plate and the bone in the jaw, to get a smooth and accurate distinction along where the boundary would be. Something that I didn't have the polys for on my low poly. turned out good enough, had to touch it up in photoshop as some areas were a bit loosely done around the edges, was easy enough though. Heres how it ended up looking in maya before I started work in Ddo

Taking this map into Ddo, initally i wanted to create 4k res textures, however I had issues with the project creation and had to create new 2k res normal and Ao maps, which was easy enough to downscale. Also as I mentioned with the complex mesh, i had to bake each part individually, so yeh, almost forgot, I ended up stitching them together, I more or less followed the process in this promotional video video for Ddo by Quixel from here on out.
(apperently Blogger isn't playing ball with the embedding here, http://youtu.be/hncqbwkGbM4)
Anyway, I imported a Tangent space normal, Object space normal, and an AO along with the Colour map
The OJS space allows DDo to assign weathering effects based on The direction, for example I can allow one side of my cannon to be more heavilly effected by dirt and rust in comparison to the other, or use colour alteration modifier to give the effect of sun bleaching along the top of my model.
After some experimentation I chose to create my materials without using any of the base set presets, that choose a subset of materials, and add certain weathering affects to them in advance, trying to find the layer in each of them that contains metallic chips in my leather sling was just painful and time consuming. It also allows me to at least take some credit for what it spat out.
I used the custom layers to pain in my undercoats, of the red and white / yellow and black grid patterns on the painted metal sections before weathering them, after that I just used combinations of various modifiers to get the effect i wanted and render them looking how I envisioned.
The only presets I used where when you assign your colour map materials, where it gives you a base specular, gloss and diffuse for the material, most of which i ended up altering anyway as it didn't quite look right, though it did serve as a good starting point.
The two most powerful parts of DDo i feel, is the ability to constrain chips and cracks to edges of an object, and dust, dirt and grime build up into the crevices. The other is that all this dust and dirt etc, modifies the specular / gloss maps, and occludes them, or in the case of water effects adds to the gloss, in the area they are covering. Personally i could easily get as good a looking diffuse as DDo has given me, but the aid in the specular detailing when it comes to dirt and dust really saved me out on a lot of time and effort in redoing alpha maps and the sorts for those layers. Along with the added bonus of having layers defined for you, and a live 3d rendering of your mesh in a trimmed down version of marmoset. Definitely something I want to look at using again in the future.

(maya setup with final textures)
Once the DDO stage was over, I went back over the diffuse in photoshop to touch some things up, such as the front of the barrel, where two material maps had had issues, and there was a strip of entirely untextured barrel, added some glowy/ flamey effects around the vents using a couple of layers and a colour dodge brush.
The pipes around the back seemed to float on top of the gas cylinder, and whilst both were grimey didn't seem to sit in, to counteract this i used one of my earlier broken maps, where the pipes baked onto the tank, to work out where they were positioned, and just darkened up the area around where they made contact, making them feel a lot more solid, and part of the same object.
Anyway, exported the diffuse, normal and specular maps, along with the height map, (despite the height maps uselessness, I kinda figured I might as well use it if i'm being given it, even if the normal map does mostly the same job.

Took them along with the mesh into marmoset, managed to set it all up easy enough, set up a few lights, anchored them to the model, as well as some others for the sky, set both the model and the sky on opposing turntables, and let havoc loose, project over, done, rendered, awesome, good, sleep.
Heres a scrappy production showreel i put together, however I'll have a more formal one up and running very soon (tm)
(apologies if the lighting comes across as dark on this, I've run it on some other monitors to my own and had problems with it)
Joking aside, was amazing to see it properly lit for the first time, and looking as badass as I had envisioned. This project was worth all the blood sweat and tears poured into it, along with the multitudes of maya crashes, heck i even bothered to work out where the crash save files were located for the first time. anyway point is, wouldn't trade it for anything, can't wait to do it again, 3D work is definitely where I'm headed, hence the new more professional looking blog.
Subscribe to:
Comments (Atom)